
How I'd Respond When a Developer Pushes AWS Keys to a Public Repo
It's not a mistake you scold someone for. It's a race, and the bots are already running.

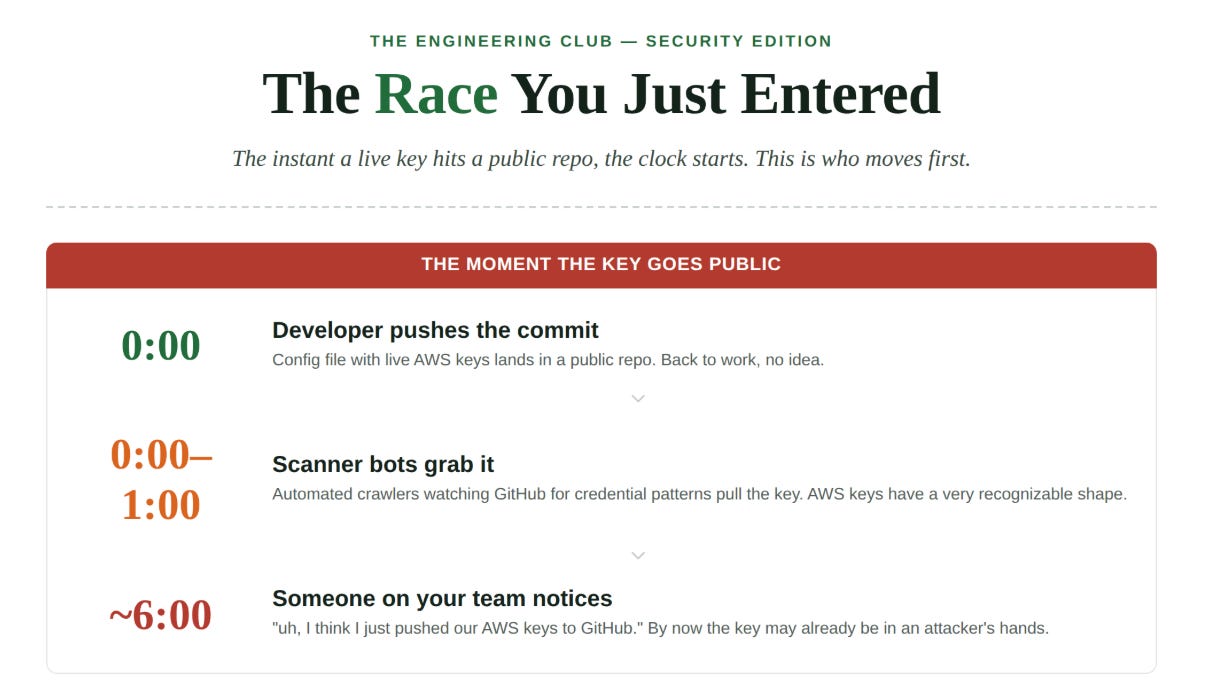
It’s 11:40 on a Wednesday morning. A developer on your team is knee-deep in a feature, moving fast, and commits a config file to get their environment working. git add ., git commit, git push. Done. Back to work.
Except that config file had the AWS access keys in it. And the repo is public.
Nobody notices for six minutes. Then someone does, and the Slack message lands: “uh, I think I just pushed our AWS keys to GitHub.”
Here’s the part most people get wrong about this moment. They treat it like a scolding opportunity. A teachable moment about .gitignore. A reason to sigh and shake their head.
It isn’t. It’s a race. And you are already behind.
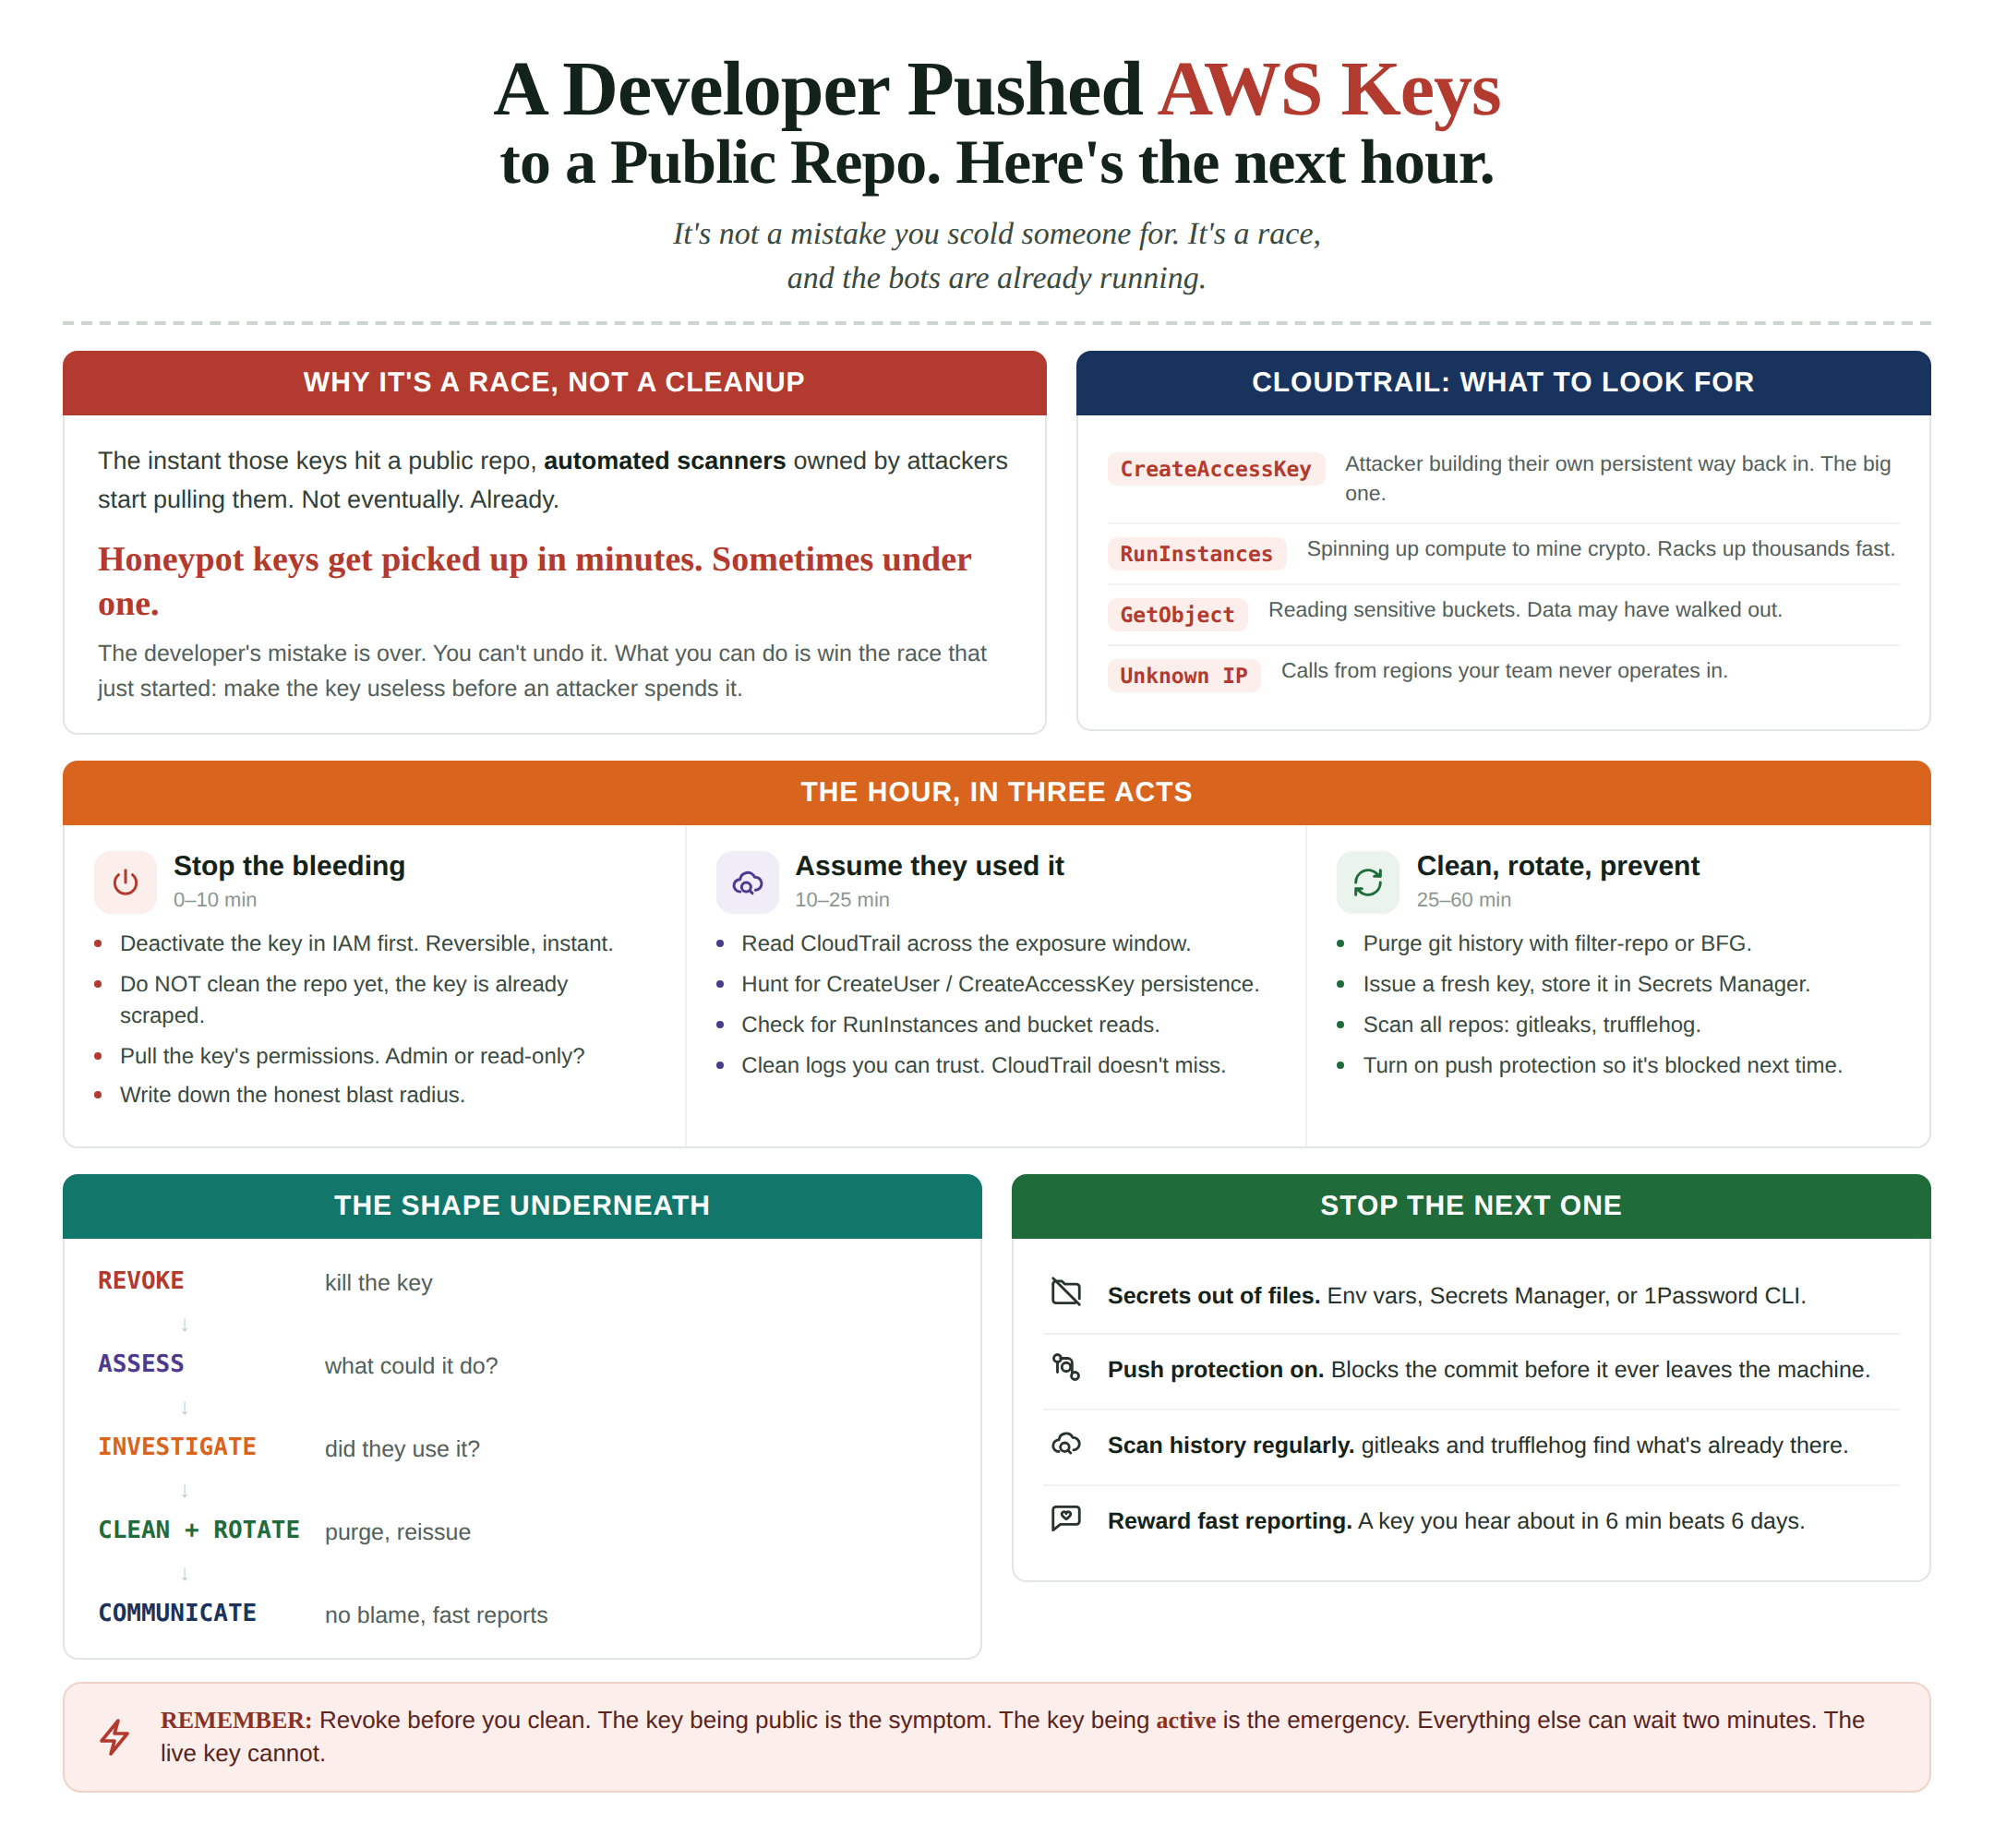
The instant those keys hit a public repo, automated scanners owned by attackers start pulling them. Not “might eventually.” Already. Researchers who’ve planted honeypot keys in public repos have watched them get picked up and used in minutes, sometimes under a minute.
There are bots whose entire job is to scrape GitHub for credential patterns, and AWS keys have a very recognizable shape.
So the developer’s mistake is over. It happened. You can’t undo it. What you can do is win the race that just started.
Here’s exactly how I’d run the next hour.
[More on The Engineers Club in the closing paragraph]
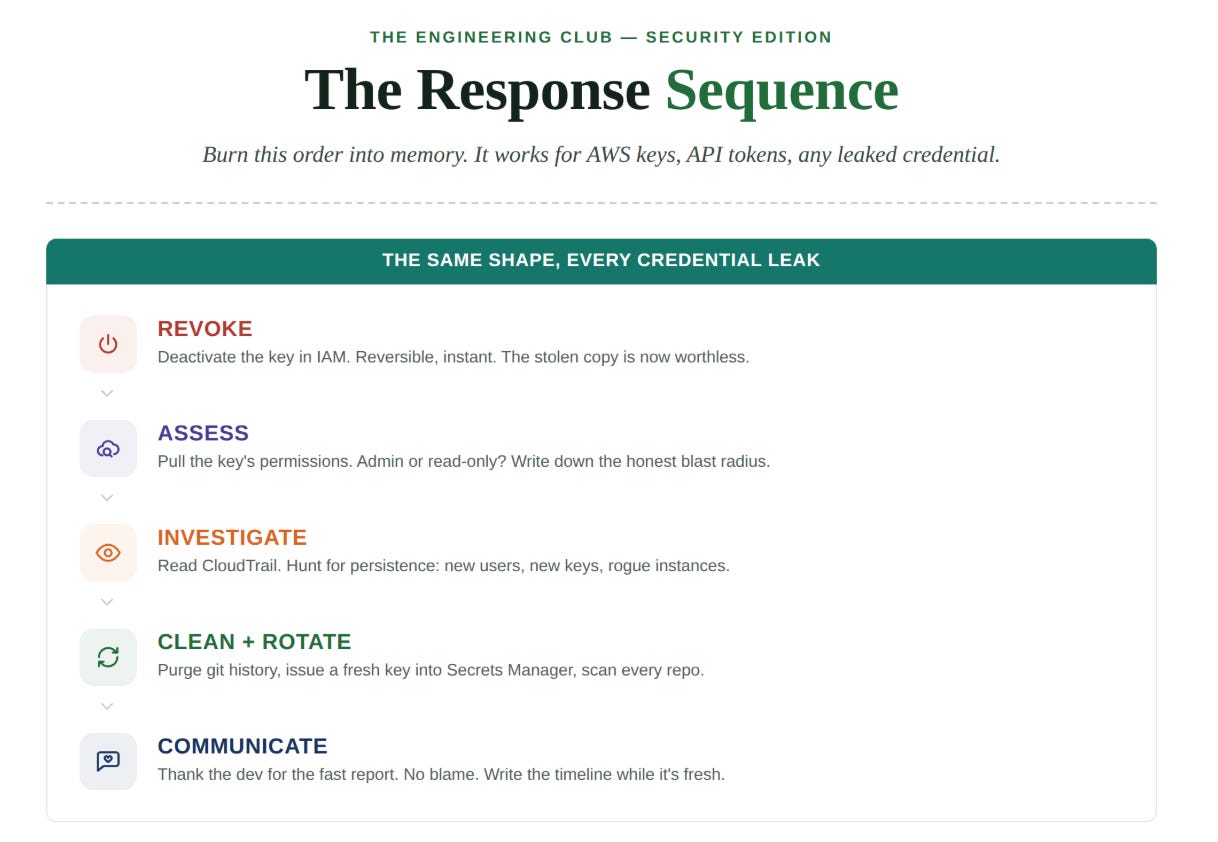
Minute 0 to 2: Kill the key. Everything else waits.
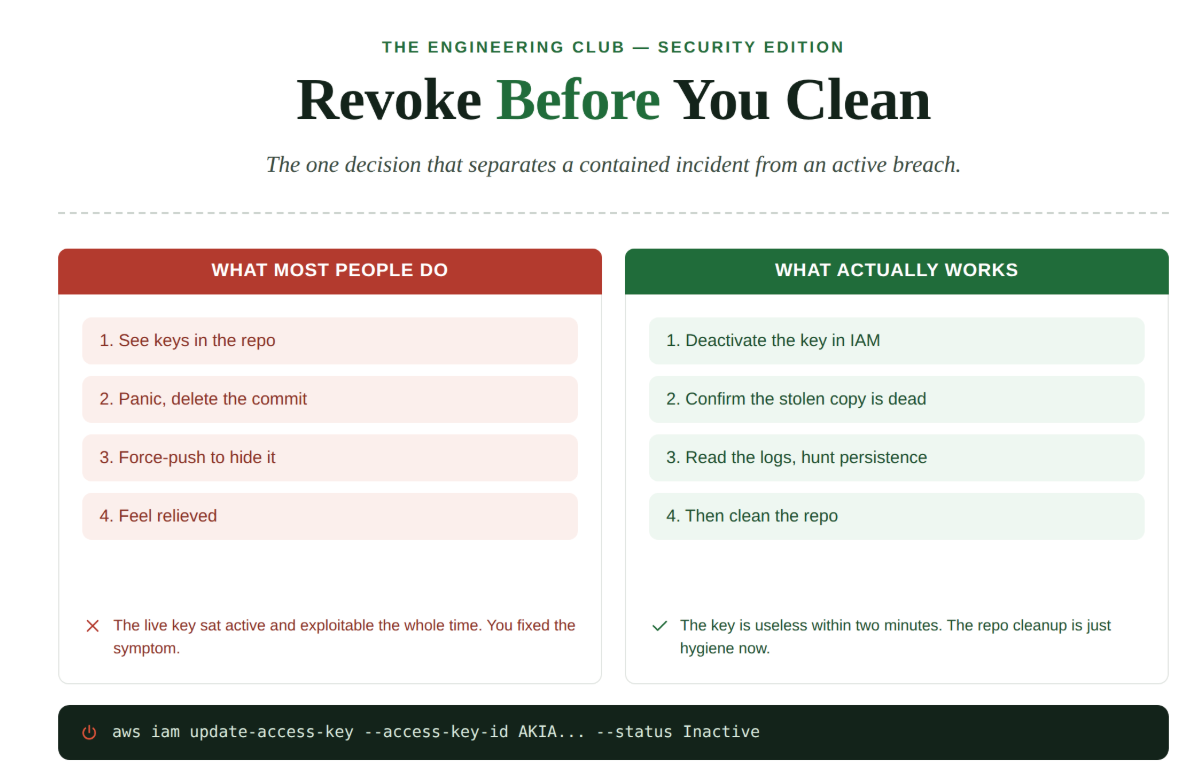
The first instinct most people have is to fix the repo. Delete the commit, force-push, make the evidence go away. That instinct is wrong, and acting on it first can cost you the whole incident.
The keys are already scraped. Cleaning the repo does nothing to stop an attacker who copied the credentials thirty seconds after the push. The only thing that stops them is making the key useless.
So the very first action, before you touch the repo, before you tell anyone, before you do anything else, is to deactivate the key in AWS.
Go to the IAM console, find the access key, and set it to Inactive immediately. This is reversible, so you’re not destroying anything, you’re just slamming the door.
Then delete it once you’ve confirmed nothing legitimate breaks. Deactivate first because it’s instant and safe. Deletion is permanent.
If you have the AWS CLI and you’re faster there:
aws iam update-access-key --access-key-id AKIA... --status Inactive --user-name the-dev
The moment that key is inactive, the stolen copy is worthless. You’ve won the most important part of the race. Everything from here is cleanup and investigation, and none of it is a five-alarm fire anymore.
This is the single most important idea in the whole response: revoke before you clean. The repo can wait. The key cannot.
Minute 2 to 10: Figure out what that key could actually do
Now that the door is shut, you need to understand what was behind it. Because “AWS keys leaked” ranges from “mildly annoying” to “the company is over,” and the difference is entirely about what that key was allowed to do.
An access key is just an identity. Its power comes from the IAM permissions attached to it. So you go find out.
Whose key was it? A specific IAM user, or worse, a role with broad access?
What policies were attached? Read-only to one S3 bucket is a very different day than Administrator Access.
Was it a long-lived user key, or a short-lived credential that would’ve expired anyway?
Pull the identity and its permissions:
aws iam list-attached-user-policies --user-name the-dev
aws iam list-user-policies --user-name the-dev
What you’re really trying to answer is the blast radius question. If this key had admin, assume the attacker could have done anything: spun up servers, read every bucket, created new backdoor users, touched your billing. If it was scoped to read a single non-sensitive bucket, you can breathe.
Write down the honest answer, even if it’s ugly. “This key had full S3 and EC2 access” is the sentence that determines how the rest of the hour goes. Don’t soften it because you’re embarrassed. The scope is the scope.
Minute 10 to 25: Assume they used it, and go look
Here’s a mistake I see even experienced people make. They revoke the key, confirm it had limited permissions, and mentally close the incident. “It was only active for eight minutes, probably fine.”
Probably fine is not an incident conclusion. You have logs. Use them.
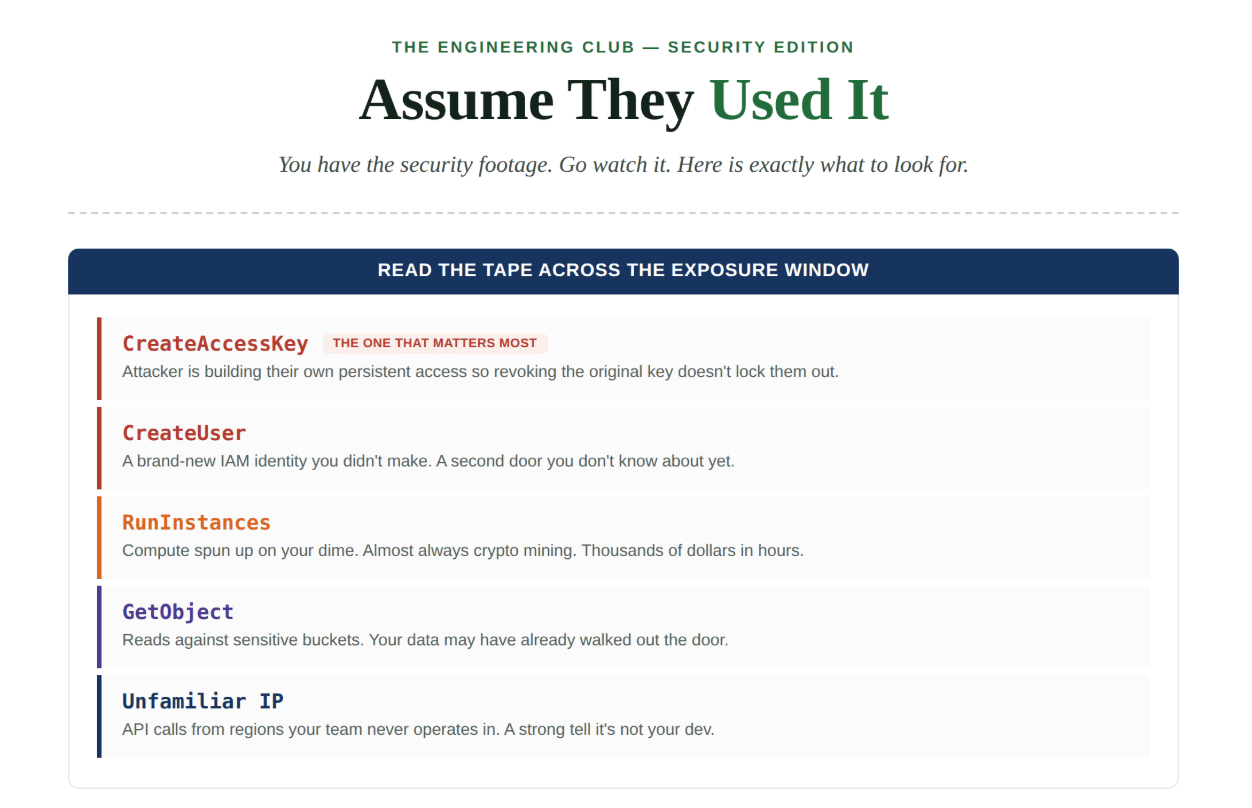
Every API call made with that key is recorded in CloudTrail. That’s your security camera footage for the entire window the key was live. So you go watch the tape, looking specifically at everything that key did between the push and the deactivation.
Filter CloudTrail events by the access key ID, scoped to the exposure window.
Look for anything the developer didn’t do themselves. Calls from unfamiliar IP addresses. API actions the developer would never make. Activity clustered in the minutes right after the push.
The patterns that should make your stomach drop:
CreateUser or CreateAccessKey — the attacker is trying to establish their own persistent access so that revoking the original key doesn’t lock them out. This is the big one. If you see this, the incident just got much larger, because now there’s a second door you didn’t know about.
GetObject on sensitive buckets — data may have walked out.
RunInstances — someone’s spinning up compute on your dime, almost always to mine cryptocurrency. This is the classic leaked-key payload, and it can rack up tens of thousands of dollars in hours.
Calls from IPs in regions your team doesn’t operate in.
If the logs are clean, genuinely clean, across the whole window, that’s a real result you can trust, because CloudTrail doesn’t miss API calls. If they’re not clean, you now know exactly what you’re dealing with, and you escalate.
One thing that matters here: check for persistence before you declare victory. An attacker who used those eight minutes to create their own IAM user does not care that you revoked the original key. Revoking the leaked key is step one. Hunting for the keys the attacker may have made is step two, and people skip it constantly.
Minute 25 to 35: Now, and only now, clean the repo
The key is dead. You know the blast radius. You’ve checked the logs. Now you can deal with the thing everyone wanted to fix first.
But understand what cleaning the repo is actually for. It is not damage control anymore, that ship sailed the moment the key was scraped. It’s hygiene, and it’s about not leaving the credential lying around for the next casual browser to find.
Here’s the subtle trap: deleting the file in a new commit does nothing. The keys are still sitting there in your git history, one git log away. You have to purge them from history entirely.
Use a tool built for this, like git filter-repo or the BFG Repo-Cleaner. Rewrite history to remove the file wherever it appears.
Force-push the cleaned history.
Remember that anyone who already cloned or forked the repo still has the old history. Public repos can be forked in seconds. This is another reason the repo cleanup is secondary: you can never fully un-leak something that was public.
And while you’re here, fix the thing that let it happen:
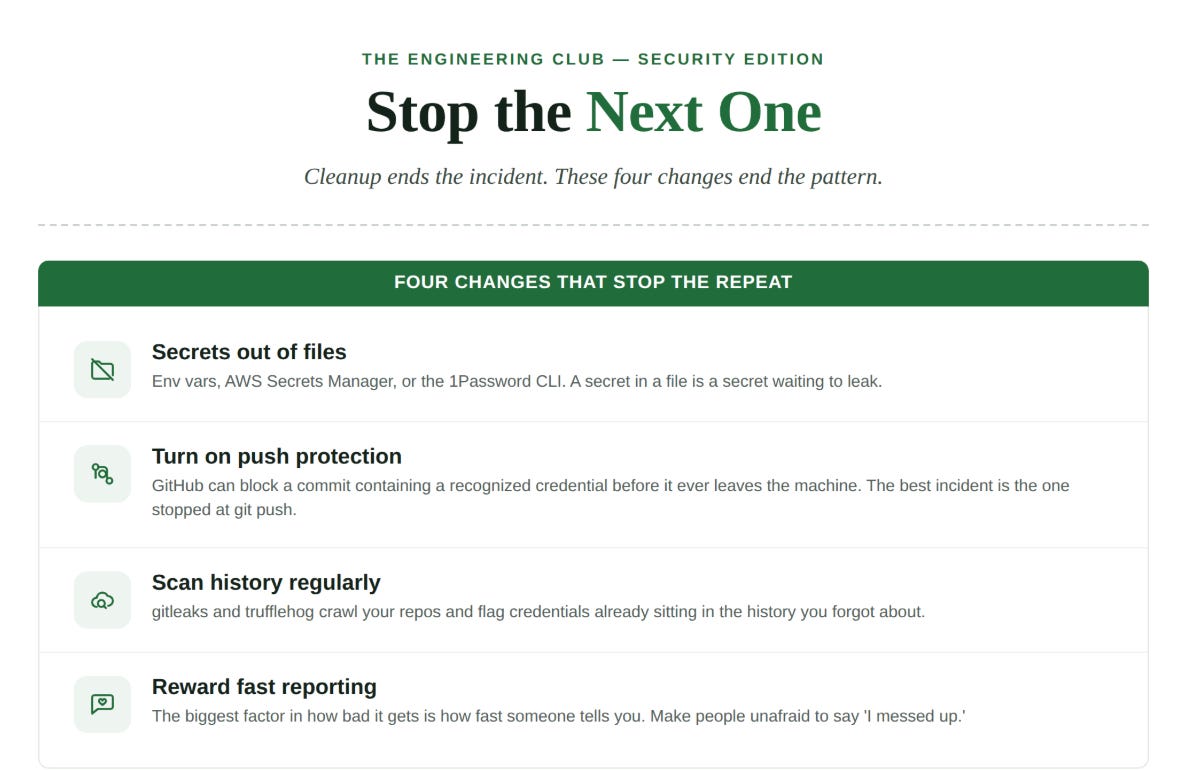
Add the config file pattern to .gitignore so it can’t be committed again.
Move the actual secrets into a proper home: environment variables, AWS Secrets Manager, or a tool like the 1Password CLI. Secrets in files are secrets waiting to leak.
The repo is now clean, but treat that as closing the barn door, not as the fix. The fix was revoking the key.
Minute 35 to 50: Rotate, verify, and make sure nothing else broke
Deactivating the leaked key stopped the bleeding. Now you need to make sure the legitimate systems that relied on that key are back on their feet with a fresh, safe credential.
Issue a new key for whatever legitimately needed the old one, and store it properly this time, never in a file that touches git.
Update the services, pipelines, or scripts that used the old key so they point at the new one.
Confirm the old key is fully deleted, not just inactive, once you’re sure nothing legitimate still depends on it.
Then widen the lens for a moment. If this developer had this key in a file, ask the uncomfortable question: how many other keys are sitting in files across your codebase right now? One leaked key is an incident. A culture of secrets-in-files is a pattern that will leak again next month.
Run a secret scanner across your repos. Tools like gitleaks or trufflehog crawl your history and flag credentials that are already sitting there.
Turn on GitHub secret scanning and push protection if you haven’t. Push protection can block a commit containing a recognized credential before it ever leaves the developer’s machine, which is the whole game. The best version of this incident is the one that gets stopped at
git push.
Minute 50 to 60: Communicate, and do not make the developer feel like a criminal
The technical work is basically done. But how you handle the human side determines whether this ever gets reported to you quickly again.
Here’s the thing about leaked credentials: the single biggest factor in how bad the damage gets is how fast someone tells you. And people tell you fast when they’re not afraid of the reaction.
If your response to “I pushed the keys” is to make the developer feel stupid, humiliated, or in trouble, you’ve just trained your entire team to hide the next one. And a leaked key you find out about in six minutes is an incident. A leaked key you find out about in six days is a breach.
So communicate like someone who wants the next report to come even faster.
Thank the developer for flagging it immediately. Mean it. Their speed is why you won the race.
Keep the tone factual, not punitive. “Great, we caught it fast, here’s what we did, here’s the one process change that stops it next time.”
Loop in whoever needs to know based on the blast radius. If the logs were clean and the key was low-scope, your lead is enough. If you saw signs of actual attacker activity, or sensitive data access, this goes up the chain, because now there may be disclosure obligations that aren’t your call alone.
Then write it down while it’s fresh. A short timeline: when the key was pushed, when it was revoked, what CloudTrail showed, what you rotated, what you changed to prevent it. This becomes your record if anyone asks later, and the basis for the process fix.
The shape underneath all of this
Step back from the specific commands and the whole response follows one shape, and it’s worth burning into memory because it applies to almost any credential leak, not just AWS keys.
REVOKE  →  ASSESS  →  INVESTIGATE  →  CLEAN  →  PREVENT  →  COMMUNICATE
(kill      (what      (did they      (purge   (stop the   (tell people,
 the key)   could it   actually       history) next one)   no blame)
            do?)       use it?)
The mistake almost everyone makes is starting at “clean.” They see keys in a public repo and their brain screams get them out of there, so they spend the first ten minutes force-pushing while the live key sits active and exploitable the entire time. They fixed the visible thing and ignored the dangerous thing.
Revoke first. Always. The key being public is the symptom. The key being active is the emergency.
And notice what almost none of this required. No reverse engineering. No deep AWS wizardry. It required staying calm, knowing the right order of operations, and refusing to skip the boring steps: checking the logs, hunting for persistence, rotating cleanly. The people who handle this well aren’t smarter. They’ve just run the sequence in their head before they had to run it for real.
It’s Wednesday again
Let’s go back to that 11:40 Slack message. “I think I just pushed our AWS keys to GitHub.”
This time you don’t panic, and you don’t reach for the repo. You open the IAM console and deactivate the key inside of two minutes, while the developer is still typing their apology.
The stolen copy is dead before an attacker can spend it. Then you pull the permissions, read the CloudTrail logs across the exposure window, hunt for any user the attacker might have created, and only then clean the git history. You rotate a fresh key into the systems that needed it, flip on push protection so this can’t happen the same way twice, and you tell the developer they did the right thing by speaking up fast.
Fifty-nine minutes. From panic to closed.
The engineer who freezes and the engineer who runs this cleanly aren’t separated by talent. They’re separated by whether they’d thought through the sequence before the message arrived.
Now you have.
And this one really isn’t hypothetical. Secrets leak to public repos constantly, from junior devs and staff engineers alike, at companies with real security teams. If you write code and push it, or you’re responsible for people who do, a version of this Wednesday is somewhere in your future. The only question is whether you meet it with a plan or with your heart in your throat.
You’ve got the plan now.
If you want to run these scenarios until the sequence is muscle memory, before the real Slack message ever lands, that’s exactly what The Engineers Club | Cyber Security Academy is built for. A path that turns “I read about incident response once” into verified, hands-on experience you can actually point to.
3 months in: hands-on tooling, threat hunting and SIEM workflows, and verified cybersecurity experience on your CV.
6 months in: a portfolio of real artifacts, a resume backed by verified experience, and you’re tooled up and ready to apply for security roles.
Inside you get video and reading material with practical labs, weekly live Q&A with Saed Farah, guest sessions from working security professionals, CV and portfolio review, and a community of engineers at every stage.
Break the cycle: theengineers.club/#careerpath
Book a consultation call: calendly.com/theengineersclub/consultation-call